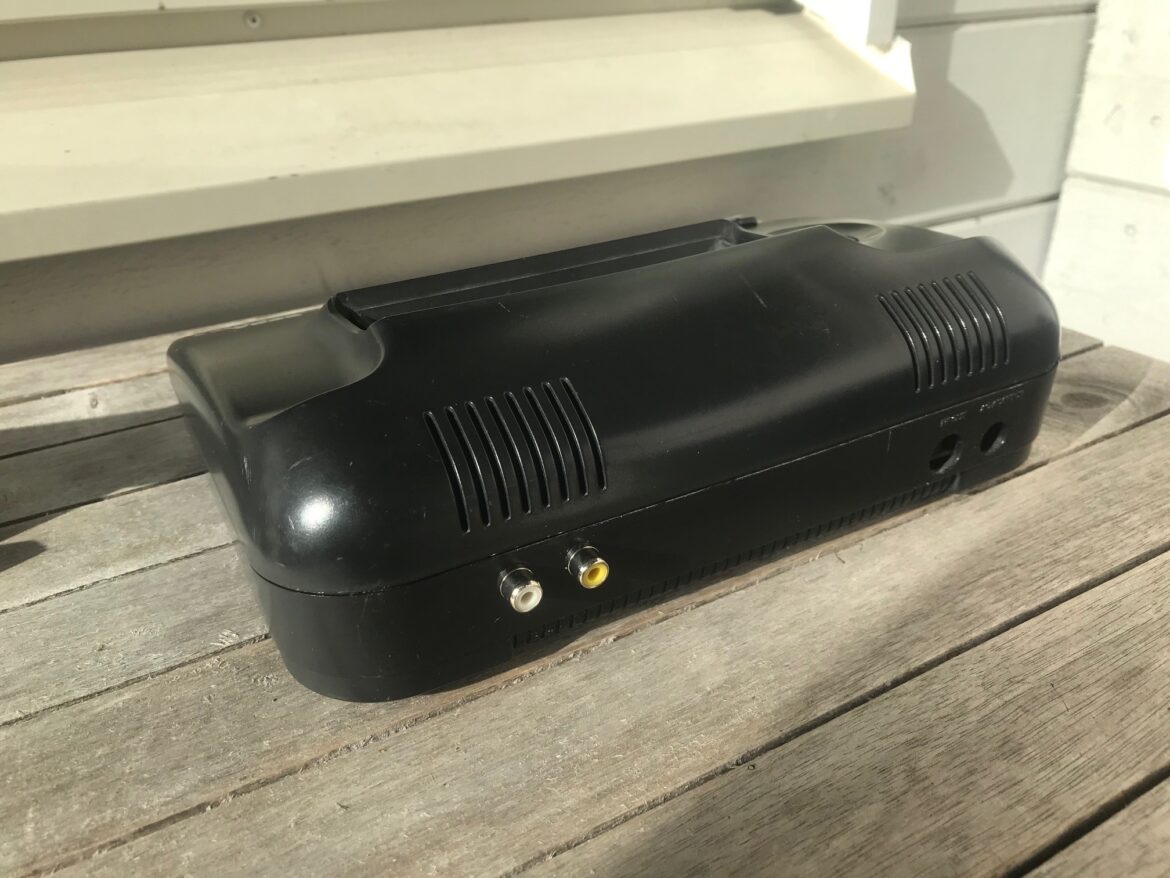
The SEGA Master System 2 was a low-cost version of the Master System console. The console was released in 1990. I recently acquired a SEGA Master System 2 with a faulty RF unit. These systems does not have another AV port, but can be easily modified to output composite video and audio through an rca jack. In this post I will show how to make such a modification. I used the following components:
- 2x RCA sockets.
- 1x 220 uF capacitor
- 1x 100 ohm resistor (I’ve seen recommendations to use 75, but some people also report using a 200 ohm resistor).
I am not going through the process of disassembly of the system since this is quite straight forward; remove the screws from under the console, remove the top, and remove the screws that keep the mainboard in place. The Model No of my unit is 3006-05A, and you can see the mainboard revision in the images below. There are some variations, and this unit is not equipped with the Sony chip near the RF unit.
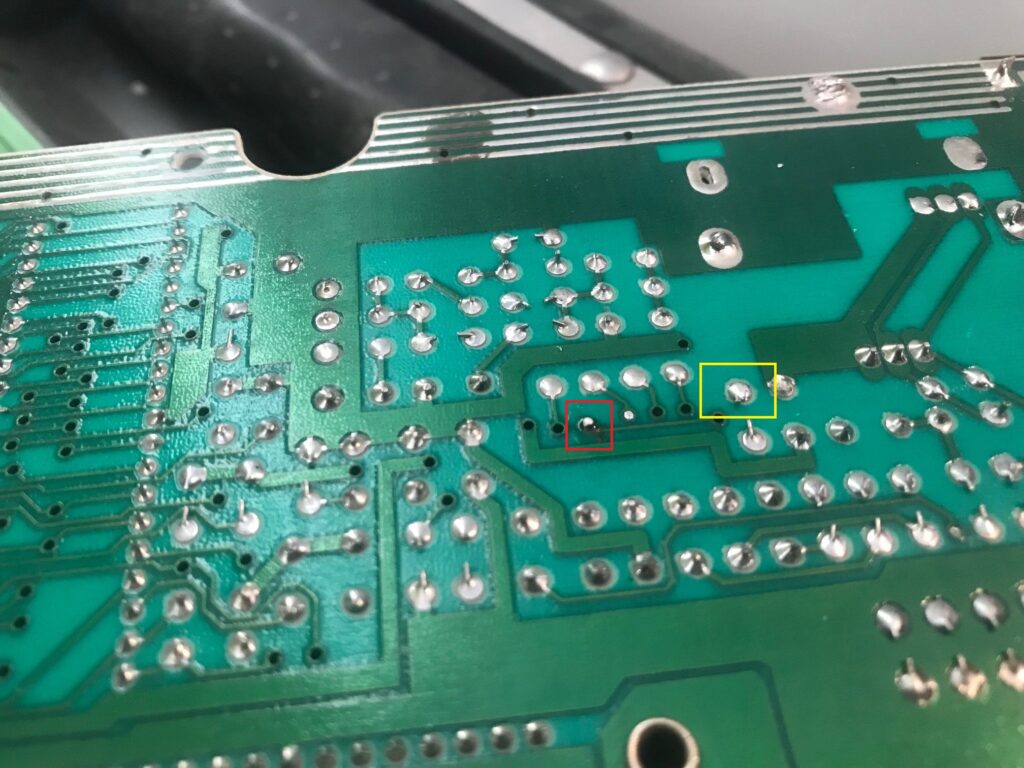
First, you want to identify two solder points underneath the mainboard. One is for audio and one is for video. The video out is marked with a YELLOW frame in the image below, and the audio out is marked with a RED frame. This is where we grab the signals from, so we solder two wires to these points. The point for audio did not have a good pad to solder a cable on at first, so I scraped a little bit on it to reveal some meta, and added some solder to the point.
I used red cables for both points, but a recommendation is to use differently colored cables (e.g. yellow and white) to separate them. You also want some ground, and here I used the RF modulator’s ground connection to add two black ground wires.
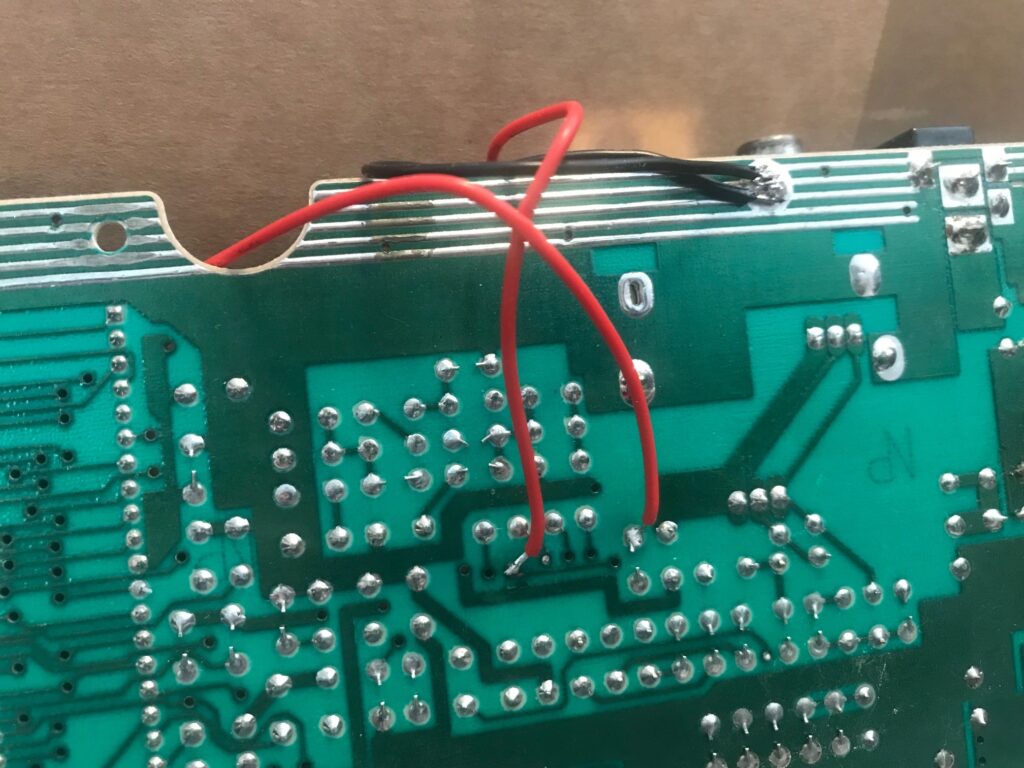
At the other end of these cables, we want our RCA sockets. To achieve an acceptable video quality, you need to add a 200 uF capacitor, and a 75-200 resistor (I use 100, higher number = darker picture, general recommendation is 75) before the video socket, as seen in the image below.
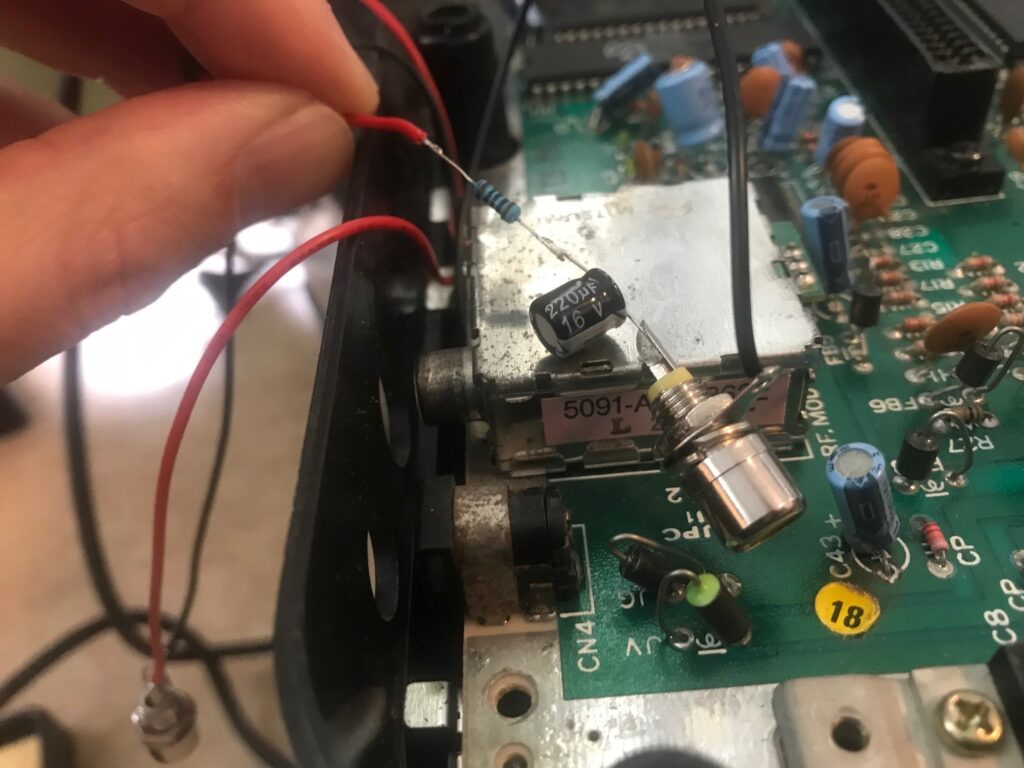
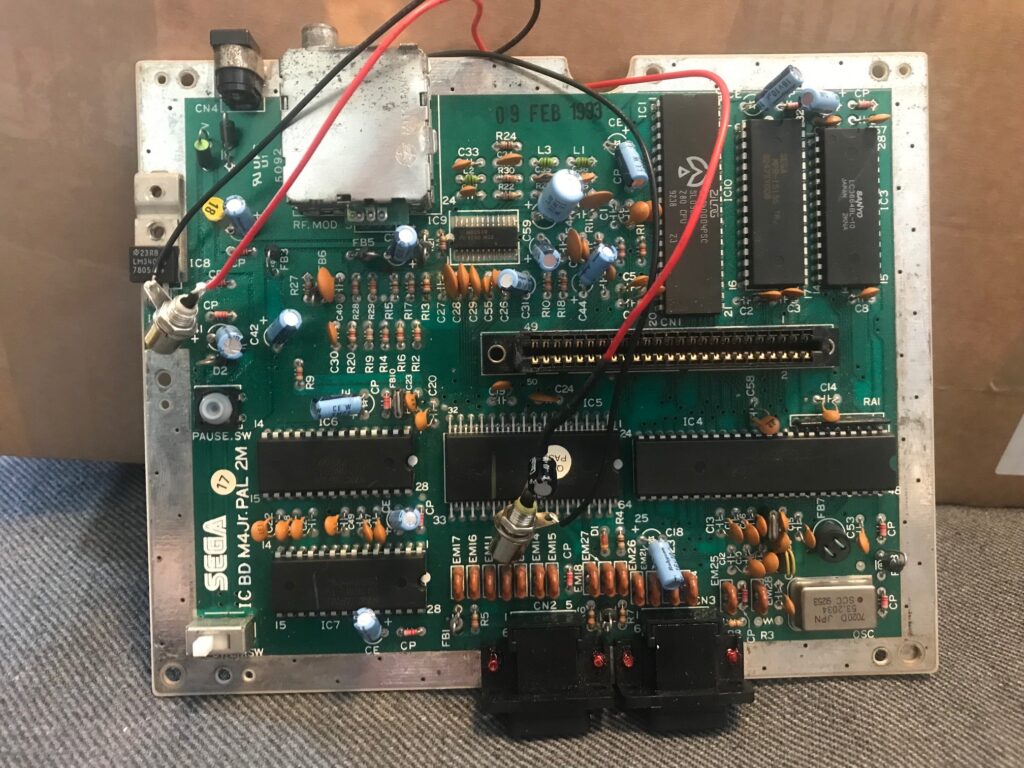
You need to add the jacks to the console before soldering the cables to them, but it is a good idea to test that everything works first.
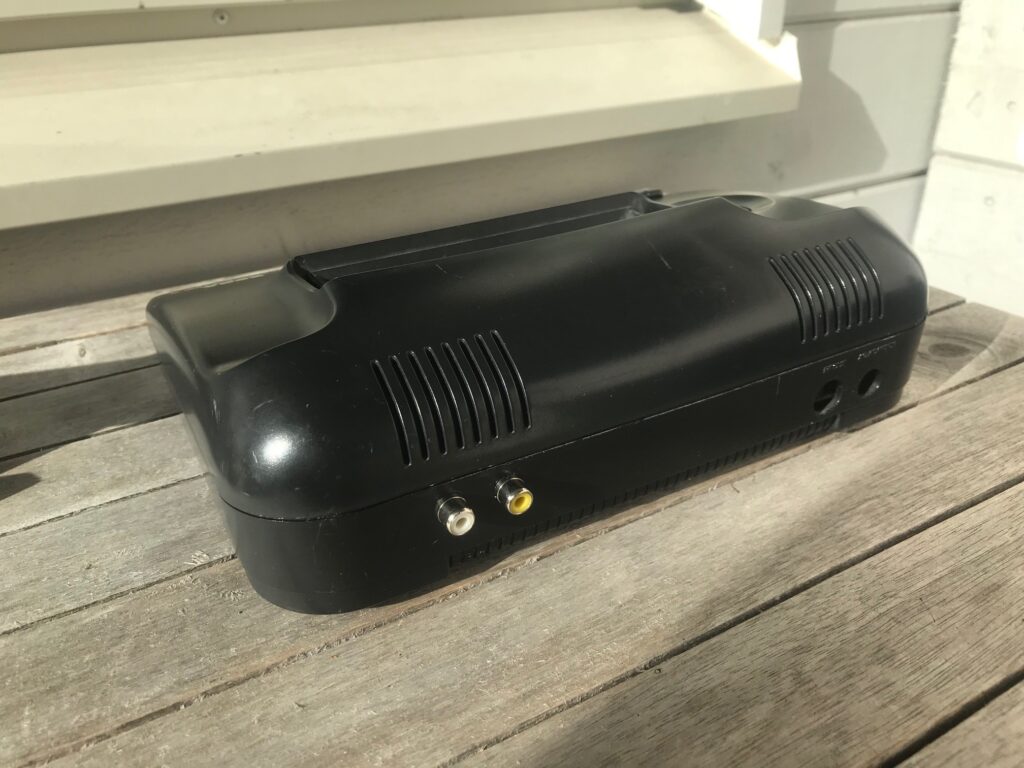
I generally don’t like to drill holes in old hardware, but this Master System 2 was quite beat up to begin with, so I made an exception this time. An alternative route is to replace the RF unit with a special cable that can output audio and video signals. Anyway, make sure to make proper measures before the drilling, leaving enough room in the case and between the sockets, and not making the holes too big.

I added some solder to the sockets before I screwed them into place. Solder the AV and ground cables onto each connector, and position the cables in a tidy way inside the case. I am quite happy with the outcome of this modification, and it adds some flexibility to the AV out for the SEGA Master System 2. If you want audio from both speakers of the TV, you can bridge the audio jack with another socket.

Happy gaming!
See also: SEGA Master System controller repair.
